
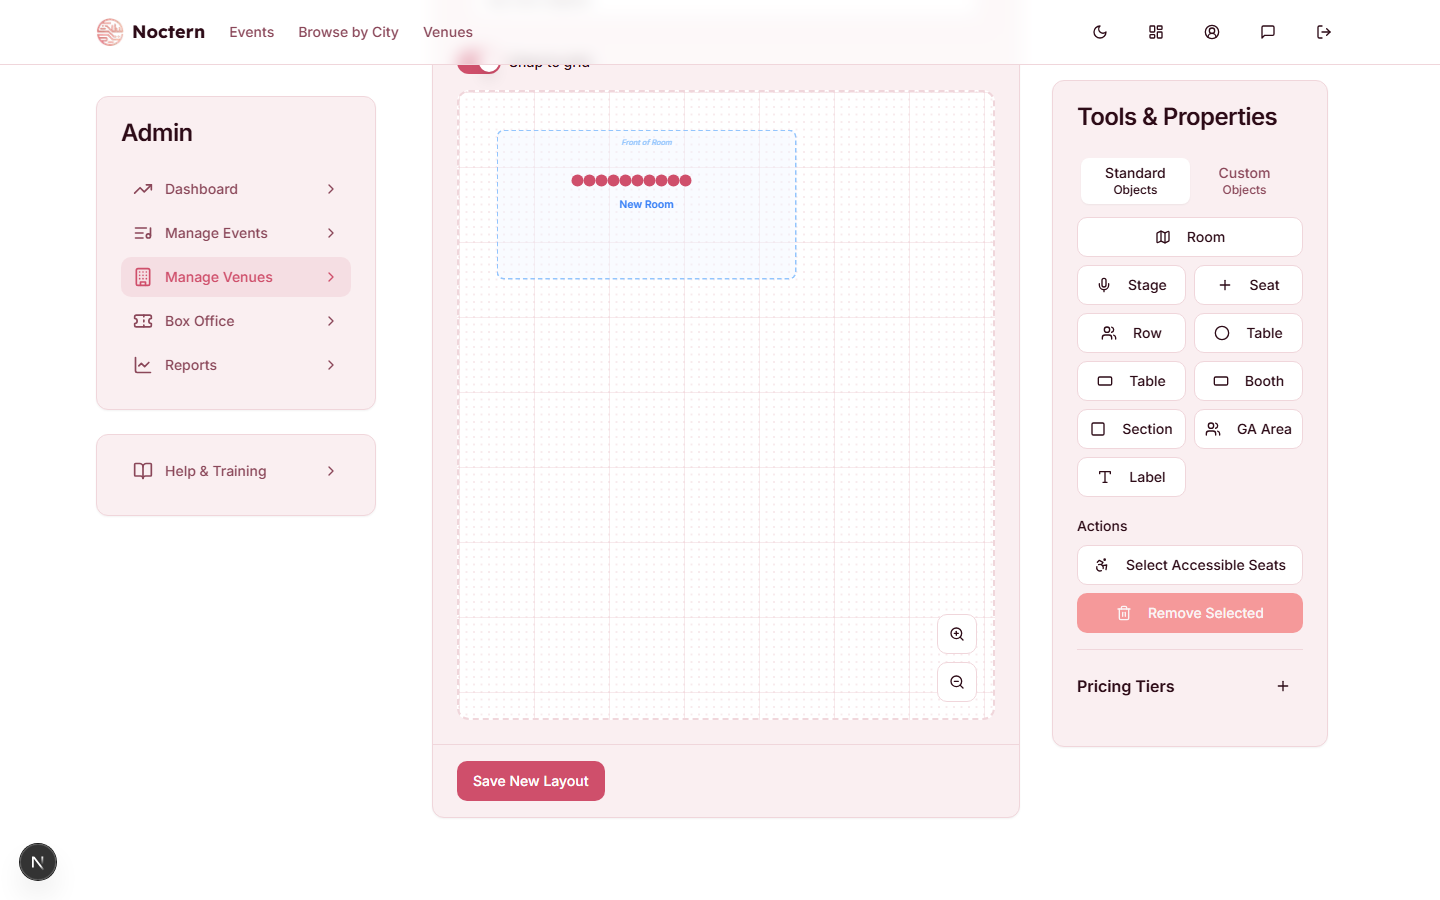
A layout is a reusable map of your seating configuration: a room with seats, rows, tables, booths, sections or GA areas inside it. Build one layout for each way you set up your venue and attach it to reserved-seating events. Many events can start from the same layout.
Go to AdminVenues[venue]Layouts to manage your layouts.
Layout types
- Reserved seating — individual seats, rows, tables, or booths; each seat a buyer reserves is its own ticket with its own QR code
- GA area — a labeled area with a capacity (no individual seats); used for general-admission sections within a reserved-seating venue
You can mix reserved and GA sections in the same layout.
Start with a room
Every layout needs a room before it can take seating. The Tools & Properties panel on the right has two tabs, Standard Objects and Custom Objects. Room is the first button on the Standard Objects tab and is always clickable — every other tool stays greyed out with an "Add a room first" hint until the layout has one.
- Select an existing layout from the Layout dropdown, or choose Create New Layout.
- Click Room. A room appears on the canvas. Drag it into position, then set Width (ft) and Length (ft) under Room Properties in the same panel.
- With a room on the canvas, the seating tools below it unlock.
Each layout keeps its own room — editing a room in one layout never changes another layout, even one that started as a copy of it.
Adding seating objects
Click a tool on the Standard Objects tab. The object appears on the canvas just to the right of the room:
- Stage, Seat, Row, Table (round or rectangular), Booth, Section, GA Area, Label
- Custom Objects tab — your venue's own saved templates (see below)
- Drag the object into the room, and resize or rotate it with its handles. To nudge a selected object, press the arrow keys (1 step; hold Shift for 10).
- Select the object and use the Properties section of the panel to set its Label and Section Name, and the number of seats: Number of Seats for a row or table, Seats for a booth.
- To mark wheelchair-accessible seats, click Select Accessible Seats under Actions, then click each seat that should be accessible. Click Done Selecting when you finish.
Select a table, booth, row, section, GA area or stage and click Save as Template under Actions to reuse it later from the Custom Objects tab. Custom objects belong to your venue, so every layout can use them.
Assigning pricing tiers
- Click + next to Pricing Tiers to add a tier. Set its name, color and price.
- Click a seat, row, table, booth or GA area to select it.
- Under Properties, choose a Pricing Tier from the dropdown. The object changes to that tier's color.
- Repeat for every object you want to sell.
Saving
There is a single Save button (Save New Layout for a layout you haven't saved yet, Save Changes afterward) — there is no separate publish step. As soon as you save, the layout is selectable on the event edit page.
A show gets its own copy of the layout it was created from — editing that show's layout never changes the original template, or any other show. Editing the original template later does not change shows that already have a copy.
Attaching a layout to an event
On the event edit page, in the Seating Layout field, select your layout from the dropdown. Each pricing tier defined in the layout maps to a tier on the event. Set the per-tier price there.
Click the ? button at the top of the layout editor for a one-page reference covering keyboard shortcuts, custom objects, pricing tiers, and how layouts relate to shows.
Create a new layout, add a room, then add a simple 3-row seating block with two tiers (Orchestra and Balcony). Save it, then create a new event, attach this layout, and set a price for each tier.